
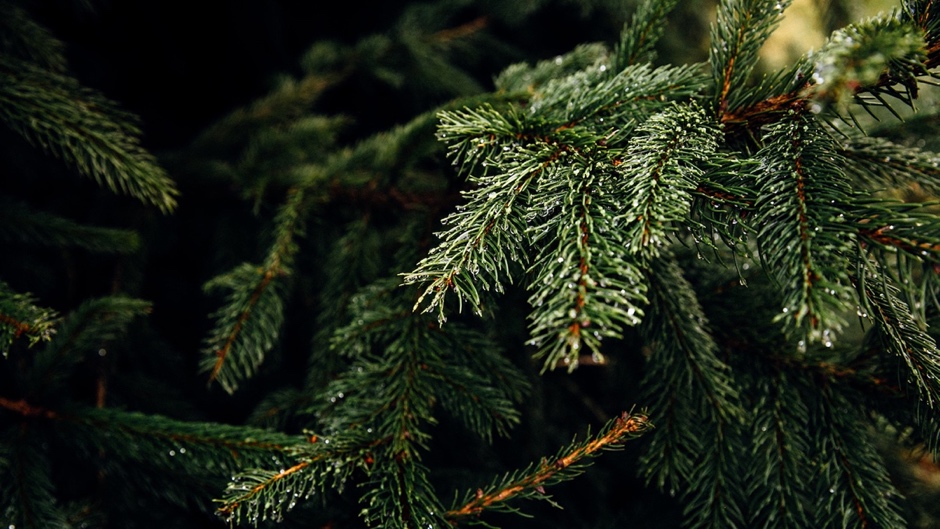
Use These 7 Proven Tips Now to Keep Your Christmas Tree Fresh and Beautiful this Holiday Season

It wasn’t easy, but you’ve picked the perfect tree for Christmas. Now, the challenge is to keep it fresh and beautiful throughout the holiday season. Doing that, however, is easier said than done. Some people use preservatives to keep their trees fresh. Preservatives have their pros and cons. Knowing those can help you make an informed decision about using Christmas tree preservatives.

Below, we discuss the pros and cons of using preservatives to keep your Christmas tree fresh and beautiful. We also provide seven additional tips on how to do that over the holiday season, emphasizing the significance of proper care in maintaining the beauty of your tree.
Tree preservatives have several pros for keeping your tree fresh:
• Reduced needle drop: By inhibiting the growth of bacteria and fungi in the tree stand water, preservatives can help prevent needle loss, keeping your tree looking fuller and greener longer.
• Improved water uptake: Some preservatives can help the tree absorb water more efficiently by lowering the water’s surface tension. This step helps ensure the tree stays hydrated and prevents it from drying out prematurely.
• Longer lifespan: Preservatives can help extend the overall life of your Christmas tree by combining the benefits of reduced needle drop and improved water uptake, allowing you to enjoy its festive presence for a longer period.
There’s no guarantee, for example, that preservatives will significantly extend the life of your tree, and they can add an extra cost to your Christmas tree budget. Also, some preservatives contain chemicals that could hurt the environment, which can be harmful if ingested by children or pets.
These chemicals can also leach into the soil and water, affecting local ecosystems. To mitigate this, always follow the instructions on the product label carefully and consider using eco-friendly alternatives. Some ingredients may cause skin irritation and harm the environment. So, check the label instructions on using the product.
Popular Christmas Tree Preservatives
Some popular tree preservatives include Miracle-Gro Christmas Tree Food, Pursell’s Christmas Tree Preservative, Bonide Christmas Tree Preservative, and EZ Gardener Christmas Tree Preservative. You can also use home remedies like aspirin or sugar as tree preservatives. Home remedies’ effectiveness can vary, but they’re among the safest approaches to keeping your tree fresh.
How effective are preservatives? Some studies on their effectiveness show mixed results. Some indicate that preservatives can slightly reduce needle drop and help the tree retain moisture. Others show minimal or no significant difference in needle retention between trees treated with preservatives and those without. When choosing a preservative, some factors include tree species, preservative type, and proper care.

Below, we discuss the pros and cons of using preservatives to keep your Christmas tree fresh and beautiful. We also provide seven additional tips on how to do that over the holiday season, emphasizing the significance of proper care in maintaining the beauty of your tree.

Tree preservatives have several pros for keeping your tree fresh:

  • Reduced needle drop: By inhibiting the growth of bacteria and fungi in the tree stand water, preservatives can help prevent needle loss, keeping your tree looking fuller and greener longer.
  • Improved water uptake: Some preservatives can help the tree absorb water more efficiently by lowering the water’s surface tension. This step helps ensure the tree stays hydrated and prevents it from drying out prematurely.
  • Longer lifespan: Preservatives can help extend the overall life of your Christmas tree by combining the benefits of reduced needle drop and improved water uptake, allowing you to enjoy its festive presence for a longer period.

There’s no guarantee, for example, that preservatives will significantly extend the life of your tree, and they can add an extra cost to your Christmas tree budget. Also, some preservatives contain chemicals that could hurt the environment, which can be harmful if ingested by children or pets.

These chemicals can also leach into the soil and water, affecting local ecosystems. To mitigate this, always follow the instructions on the product label carefully and consider using eco-friendly alternatives. Some ingredients may cause skin irritation and harm the environment. So, check the label instructions on using the product.

Popular Christmas Tree Preservatives

Some popular tree preservatives include Miracle-Gro Christmas Tree Food, Pursell’s Christmas Tree Preservative, Bonide Christmas Tree Preservative, and EZ Gardener Christmas Tree Preservative. You can also use home remedies like aspirin or sugar as tree preservatives. Home remedies’ effectiveness can vary, but they’re among the safest approaches to keeping your tree fresh.

How effective are preservatives? Some studies on their effectiveness show mixed results. Some indicate that preservatives can slightly reduce needle drop and help the tree retain moisture. Others show minimal or no significant difference in needle retention between trees treated with preservatives and those without. When choosing a preservative, some factors include tree species, preservative type, and proper care.

Additional Tips on Keeping Your Tree Fresh

While preservatives may offer some benefits, they’re not a silver bullet. They won’t keep your tree fresh all by themselves. Here are seven other things you can do to keep your Christmas tree fresh:

  1. Make a fresh cut: Before placing the tree in the stand, cut off about an inch from the base of the trunk. This step removes sap that has sealed off the pores, allowing the tree to absorb water more effectively.
  2. Water immediately & regularly: Fill the stand with water when you bring the tree home. Check the water level daily and refill it as needed. Never let the water level drop below the base of the trunk.
  3. Avoid heat sources: Keep the tree away from heat sources such as fireplaces, radiators, and heat vents. Direct sunlight can also dry out the tree.
  4. Choose the right stand: Select a sturdy tree stand that can hold plenty of water. The stand should be large enough to accommodate the tree’s base and deep enough to hold at least 1 gallon of water for every inch of trunk diameter. Look for stands with a wide base for stability and a large water reservoir to reduce the frequency of refilling.
  5. Increase humidity: Use a room humidifier to increase the moisture in the air, which can help prevent the tree from drying out.
  6. Reduce stress: Avoid over-handling the tree. Gently guide branches into position and minimize bending and breaking.
  7. Turn off lights: Turn off Christmas tree lights when you leave the house or go to bed to reduce heat stress on the tree.

These tips can help you keep your Christmas tree fresh and beautiful throughout the holiday. When the holidays are over, recycle your tree at a designated drop-off location. Many communities offer free tree recycling programs. Contact RI Tree if you have additional questions about keeping your tree fresh or recycling it.

Eco-Friendly Christmas Trees That Support Sustainability: 6 Options

There’s nothing like a real Christmas tree. Buying and decorating a real tree is a cherished holiday tradition passed down through generations for many families. Real Christmas trees emit a delightful pine scent that fills your home with the classic holiday aroma, adding to the holiday spirit. For those who had a real tree every year growing up, the sight and smell of one evokes nostalgia and great memories. Buying a real Christmas tree also supports local businesses and farmers, contributing to the local economy.

But for environmentally conscious people, choosing an eco-friendly Christmas tree is an option. For many people, making eco-friendly choices aligns with their values and beliefs. Eco-friendly trees offer numerous benefits, including reducing carbon emissions and your carbon footprint, conserving natural resources, and protecting wildlife habitats. Put another way, choosing an eco-friendly tree is a way to celebrate the holiday season responsibly and contribute to a more sustainable future.  

Here are six eco-friendly options for this Christmas season:

  1. Live Potted Trees: Choose a small, potted tree that you can plant outdoors after the holidays. This sustainable option adds greenery to your home and supports local nurseries.
  2. Artificial Trees: A high-quality artificial tree can be reused for many years, reducing waste from disposable trees. Look for trees made from recycled materials or eco-friendly plastics.
  3. Recycled Trees: Some companies offer Christmas trees made from recycled materials, such as plastic bottles or cardboard. These trees are a unique and sustainable option.
  4. Rented Trees: Renting a real Christmas tree is a great way to enjoy the beauty of a natural tree without contributing to deforestation. After the holidays, the tree is returned to the farm to be replanted.
  5. Houseplants: Decorate a small houseplant, such as a Norfolk Island pine or a rosemary bush, with lights and ornaments for a festive, sustainable centerpiece.
  6. Minimalist Trees: To reduce your environmental impact, look for a smaller tree or a tree with fewer decorations. Focus on quality over quantity and choose sustainable decorations.

Many eco-friendly options, like live trees and recycled artificial trees, can be easily recycled or composted. In some communities, recycling programs for real Christmas trees often support community projects and charities.

Tips on Picking a Real Christmas Tree

For those of you who must have a real Christmas Tree, we’ve provided nine tips on buying one. Keep the following tips in mind, and you’ll come home with the best tree for you and your family:

  1. Measure the space first. Before going shopping, measure the area where you will put the tree. That way, you won’t buy a tree that’s too big or too small.
  2. Look for a fresh tree. You want a tree with fresh green needles firmly attached to the tree and has a pleasant piney smell.
  3. Shake the tree. If too many needles fall off, the tree is too dry to buy.
  4. Bend the branches. They should be flexible yet firm. The branches shouldn’t snap easily, either.
  5. Look for a tree with a strong central leader. It’s the main vertical branch that runs up the tree’s center. You want it to be straight and strong.
  6. Inspect the trunk for damage. The trunk should be straight and free of cracks and splits.
  7. Cut the bottom of the tree. Ask the salesperson to cut the bottom of the tree before you leave. Cutting the bottom helps the tree take up water.
  8. Place the tree in a stand filled with water. Keep the water level constant while you have the tree, and check it daily.
  9. Place the tree in a safe location. Keep it away from heat sources in your house, like fireplaces and radiators, to prevent it from drying out too soon.

Keep these tips in mind when buying your Christmas tree. They’ll help you find the perfect tree for you. Ultimately, the best tree is the one that you like the best.

Top Christmas Tree Farms

For places to buy a freshly cut Christmas tree, check out the Rhode Island Christmas Tree Growers Association (RICTGA). It is an association of growers and retailers interested in promoting the Christmas Tree Industry. It lists Christmas tree growers in Rhode Island, Massachusetts, and Connecticut.

You can also visit retail stores like Home Depot, Walmart, and Target. They also sell Christmas trees and carry a wide selection of artificial ones in various sizes and styles, making them a convenient option for those who prefer a prelit or hassle-free tree.

Enjoy the holidays!

Latest Update on Beech Leaf Disease in New England

Beech trees are a keystone species in many ecosystems. Their fruit – the beechnut – is a food source for many animals, including squirrels, deer, birds, and bears. Their canopies shelter animals and provide nesting sites for birds. Their wood is solid and hard with a beautiful grain. Beeches are also famous for their fall foliage and smooth bark. Plus, they have some cultural significance. Ancient people used their bark as paper.

But beeches are under attack now from Beech Leaf Disease (BLD), a deadly disorder that threatens native American beeches and ornamental European beeches. Researchers first detected BLD in Ohio in 2012. It then spread to other states and Canada. It’s now in 12 U.S. states and several Canadian provinces. Researchers found BLD in CT in 2019 and RI and MA in 2020. BLD is especially deadly to young beech trees and the ecosystems they support.

What is Beech Leaf Disease?

Nematodes cause BLD. These microscopic worms (Litylenchus crenatae mccannii) spend the winter in beech buds and beech leaves and emerge in the spring, showing damage to the tree. Infected leaves have dark brown bands between leaf veins or are crinkled, smaller, and leathery than typical beech leaves. Symptoms are more noticeable on North American beeches than on European beeches.

Some beech buds won’t open on heavily infected trees. Severely damaged leaves will fall off soon after emerging in May. New leaves may appear in June in new buds and won’t show signs of the disease, but they will be paler and weaker than typical healthy leaves. Wind plays a big role in spreading the disease. So does the movement of infected plant material like firewood or nursery stock. BLD can spread fast in a forest

Impact of Beech Leaf Disease

Researchers are seeing beeches die within 6-12 years of infection. In Southern New England, beeches often die within a few years of infection. The disease’s effects on trees are critical. Like many tree diseases, BLD reduces photosynthesis and growth and increases susceptibility to other pests and diseases that can kill trees. BLD also causes loss of biodiversity and alteration of the forest ecosystem. Plus, it impacts the timber industry and tourism.

Researchers are working on management solutions for BLD. But there isn’t a cost-effective solution for forested environments yet. There are no effective fungicides for BLD, and treating large mature trees is difficult. Management options are limited but include the following:

  • Early detection and removal of infected trees
  • Development of resistant beech tree varieties
  • Biological control agents
  • Public awareness and education campaigns

In 2017, Ohio researchers had some success managing the disease by treating the soil around small beech trees (about 2-4 inches deep) with a phosphite product called PolyPhosphite 30. Phosphite products are known to stimulate a plant’s defenses.

The researchers treated the trees twice a month with the product about a month apart. The trees were much better after five years than the untreated control trees. They also found fewer nematodes on treated trees than on control trees. We hope to see similar results in New England.

How to Treat Beech Trees

Phosphite products for BLD are available to homeowners. Look for a product that is designed for BLD treatment. Agri-Fos and ProPhyt are good options for BLD. These products are in liquid form. Below are the seven steps to treating a BLD outbreak using a phosphite-based product and a soil drench approach:

1.     Measure the tree’s diameter at breast height—about 4.5 feet high

2.     Follow the product’s label instructions for dosage

3.     Mix the product with water according to the label

4.     Clear the area around the tree’s base of debris and leaf litter.

5.     Slowly pour the diluted phosphite solution into the soil.

6.     Let the solution soak into the root zone.

7.     Water the soil after application to help the solution penetrate deeper

Treat BLD in early spring before new growth begins. You may need to treat the area again later in the growing season. Depending on the disease’s severity and dosage instruction, you may need to treat the soil again.

You can also use a soil injection method to treat BLD. However, you need special equipment to inject phosphite into the soil around the root zone. Follow the manufacturer’s instructions for injection depth and spacing.

If you still have questions about BLD or its treatment, contact an arborist or RITree.  

7 Causes of Major Plant Failure That Can Devastate Your Trees

Trees fail more often than you think. Various factors can trigger failure. When that happens, the tree can pose significant risks. So, you may need to remove the tree. That can be costly.

Understanding the factors that cause major tree failure can help you save a tree. It can also boost awareness for better tree care practices.

Below are seven causes of major tree failure and how to stop them from devastating a tree. For more information on plant failure, see this blog post)

  1. Diseases— They can weaken a tree’s structure, causing it to fail. Root damage and unfavorable weather can also help with diseases. Early detection is critical. Identify the pest, choose the correct control method, and apply it.
  • Pests—They can eat away at a tree’s roots, leaves, and/or trunk. That can weaken its structure and boost its disease susceptibility. Identify the pest. Then, choose the correct treatment to eradicate the pest. You can also consult RI Tree on pests and their controls.
  • Weather—Severe weather events, like snowstorms and high winds, can cause major tree failure. Inspect your trees after severe weather events. Look for signs of damage. Proper pruning keeps trees healthy and minimizes wind resistance, improving overall health.
  • Improper planting— Planting trees too deeply, in the wrong location, or using improper techniques can generate root problems. That. in turn, can cause tree failure. You can’t do much to fix a tree planted incorrectly. You can, however, learn from your mistakes.
  • Root damageConstruction, soil compaction, and other activities can damage a tree’s roots, compromising its health and stability. Proper watering, fertilizing, and mulching can help overcome root damage.
  • Poor maintenanceNeglecting trees can lead to big problems and eventual failure. Take care of your trees. That includes regular watering, pruning, and mulching. It also includes monitoring signs of disease or pest infestation.
  • AgeMature trees become more susceptible to failure as they age. Proper care can increase a tree’s life. Even with the best care, trees will fail. Remove the tree as soon as you can. (See our blog post on preserving older trees.)

Major tree failure happens all too often. That can cost you big time. Be mindful of the seven major causes of plant failure described above. In severe cases, consult a certified arborist or contact RITree for help. 

How to Prevent Fungal Diseases in Your Plants: 5 Tips

Fungal diseases can devastate trees and plants. They can cause cankers, leaf diseases, and root rot. Factors affecting the impact of fungal diseases include tree and plant health, environmental conditions, and the type of fungal species.

Different fungal species have varying levels of aggressiveness and target specific parts of a tree. Pruning infected branches or removing infected leaves can help contain the spread of these diseases, but eliminating these diseases is still a challenge.

Prevention is the best way to eliminate fungal diseases. Choose plant and tree varieties resistant to common fungal diseases in your region. Below are some additional measures to help prevent fungal diseases from attacking your plants.

  1. Use proper planting techniques: Spacing is critical for fungal diseases. It allows for good air circulation and prevents overcrowding, which can favor fungal growth by creating a humid environment.
  2. Watering practices: Water deeply and infrequently, aiming for the base of the plant or tree rather than overhead watering.
  3. Mulching: Spreading a layer of mulch around the base of your plants and trees will help you retain moisture in the soil, which is critical. Mulch also prevents excessive dampness near the stem, creating a less hospitable environment for fungi.
  4. Sanitation is critical in preventing the spread of fungal diseases. Remove and dispose of diseased plant material promptly. Also, clean and disinfect pruning tools regularly to prevent the spreading of fungal diseases between plants.
  5. Promote plant health: Use balanced fertilization to give your trees and plants the nutrients to thrive. Healthy plants are more resilient and better able to resist fungal infections.
    The five steps above can help create a healthier and more hospitable environment for plants and trees while preventing fungal diseases. By learning about these diseases, taking the proper countermeasures, and treating the diseases when they first appear, you can significantly lessen a fungi’s impact.

Soil Testing: A Practical Guide to Ensure Your Trees Thrive

Soil testing, a crucial step before tree planting, offers many benefits. It pinpoints nutrient deficiencies, reduces resource wastage, and reveals your soil’s pH level and nutrient needs, among other things. This knowledge is key to ensuring your tree or trees thrive. The optimal time for soil testing is a few weeks before planting.

You can test the soil with a home testing kit, readily available at garden centers and big box stores. Or, you can go to a soil testing lab like the University of Rhode Island’s Cooperative Extension. You can also go to private companies that offer soil testing services.
Tips on Soil Testing Yourself
Below is a step-by-step breakdown of how to test your soil:

  1. Gather your tools—You’ll need a clean trowel or spade, a bucket, and a permanent marker. Wear gloves for ease of handling soil, and use a stainless steel or chrome-plated soil probe. Brass, bronze, or galvanized tools can contaminate samples with copper or zinc.
  2. Choose the testing method—Decide whether you’ll use a home test kit (faster but less accurate) or send a sample to a lab (more precise but takes longer).
  3. Target planting area—Collect samples from where you plan to plant your tree.
  4. Sample depth—Aim for 6-12 inches deep, where tree roots will establish. (If you’re testing soil for lawns, go 3 inches down.)
  5. Multiple samples—Take 10-15 samples in a zig-zag pattern to get a good representation of the area. Avoid areas with obvious signs of contamination or recent fertilization.
  6. Mix it up—In your clean bucket, combine all the collected soil samples and mix them thoroughly. Remove any large rocks or other non-soil particles from the soil.
  7. Sample amount—Depending on your chosen testing method, take the recommended amount of the composite sample (usually 1-2 cups) for testing. Label the container with your name, collection date, and intended planting area.
    Soil testing is a valuable tool that can help ensure your tree’s success. If you’re unsure about the process contact RI Tree. Our experts can provide the guidance and support you need to test your soil successfully.

Discover the Power of Soil Testing: A Practical Guide to Ensure Your Trees Thrive

Testing your soil is a critical step before planting a tree. Testing your soil identifies nutrient deficiencies. Knowing what nutrients your soil lacks helps you choose the right fertilizer to give your tree a healthy start. You also test the soil to check its pH level. Most trees prefer slightly acidic to neutral soil (pH 6-7). If the pH is too high (alkaline) or too low (acidic), it can prevent trees from absorbing nutrients.

A third reason to test your soil is to avoid wasting resources. By understanding your soil’s baseline, you can avoid applying unnecessary fertilizers or amendments. Testing helps you target exactly what your soil needs, avoiding over-application and potential environmental harm from fertilizer runoff. For fruit trees, proper soil nutrients impact the quantity and quality of fruit produced, and a soil test can help you optimize your soil for a bountiful harvest.

Best Time to Test Your Soil
The best time to test your soil is a few weeks before planting. That allows you time to amend the soil if needed, based on the test results. You can test the soil yourself using a home testing kit, which is readily available at garden centers and big box stores. This method will give you a basic analysis of pH and nutrient levels. Convenience is a key benefit of testing the soil yourself. Self-testing also creates a good entry point for those new gardeners to learn more about soil and plant needs.

For a more precise analysis, consider sending your sample to a professional soil testing lab. Local extension offices can often provide recommendations on labs. In Rhode Island, you can test your soil at the University of Rhode Island’s Cooperative Extension, College of the Environmental and Life Sciences. Below is more information on how to do that. (If you’re not from Rhode Island, you can find a state-by-state list of soil testing labs on this website.)

Several private companies offer soil testing services. These labs may offer a wider range of tests or faster turnaround times than university labs.
Here are a couple examples:
• New England Testing Laboratory (https://www.newenglandtesting.com/Privacy.php) in West Warwick, RI.
• New England Specialty Soils Screening Facility (https://www.nesoils.com/) in Lancaster, MA.
Consider factors like the type of test you need, turnaround time, and cost when choosing a testing service.
Soil Testing in Rhode Island

The URI lab offers many free and low-cost informational and diagnostic services to Rhode Island citizens. Its Master Gardeners conduct free soil pH testing for the residents of Rhode Island and surrounding areas from March through October. These tests will help determine soil pH levels and predominant soil texture. It also provides basic information and recommendations for the gradual correction of soil pH and compaction issues.

You have two ways to get your soil tested with this program. You can attend a community event where URI’s Gardening Information and Soil Testing booth will be. See the 2024 schedule here. Or, you can mail-in your sample with a Soil Test Result Report Form. Print the form, complete it, and send it along with your sample to URI Cooperative Extension, 3 East Alumni Ave, Kingston, RI 02881. Please include ‘Attn: Soil Test’ on the envelope.

Here’s a step-by-step breakdown of what’s involved in testing your soil for planting trees. Keep in mind that preparation is critical to getting a good sample for testing:

  1. Gather your tools—You’ll need a clean trowel or spade, a bucket, and a permanent marker. Consider wearing gloves for ease of handling soil. Use a stainless steel or chrome-plated soil probe. Brass, bronze, or galvanized tools can contaminate samples with copper and/or zinc.
  2. Choose the testing method—Decide whether you’ll use a home test kit (faster but less accurate) or send a sample to a lab (more precise but takes longer).
  3. Target planting area—Collect samples from the area where you plan to plant your tree.
  4. Sample depth—Aim for 6-12 inches deep, where tree roots will establish. (If you’re testing soil for lawns, go 3 inches down.)
  5. Multiple samples—Take 10-15 samples in a zig-zag pattern to get a good representation of the area. Avoid areas with obvious signs of contamination or recent fertilization.
  6. Mix it up—In your clean bucket, combine all the collected soil samples and mix them thoroughly. Remove any large rocks or other non-soil particles from the soil.
  7. Sample amount—Depending on your chosen testing method, take the recommended amount of the composite sample (usually 1-2 cups) for testing. Label the container with your name, collection date, and intended planting area.
    Additional Tips:
    • A soil probe or auger is the best tool for sampling, especially if the soil is very stony or gravel.
    • If a soil probe or auger is not available, use a garden trowel, shovel, or spade to dig into the desired depth of the soil depth.
    • Cut out a triangular wedge of soil. Then, set it aside (to be replaced after sampling). Slide your blade into the soil again, taking a thin (half-inch) slice from one side of the hole.
    • Store your labeled soil sample in a cool, dry place until testing.
    • Some labs offer online tools to help interpret your soil test results and recommend amendments if you’re using the self-test approach.
    • If you’re submitting your sample to a soil testing lab, you’ll need a soil sample information sheet and a soil sample box. Both are available from the extension office in your county or city.
    By following these steps, you can gain valuable insights into your soil’s condition and ensure your new tree has the best chance of thriving. All the tools mentioned in this article are available online. If you need help taking a soil sample, contact RI Tree. Our experts can guide your through the process.

Planting Fruit Trees in Backyard is Safe, Reliable, and Fun: 7 Tips

Have you considered planting a fruit tree in your backyard? Fruit trees not only provide delicious homegrown fruit but also offer numerous benefits. The right fruit tree can transform your backyard, provide shade in the summer, contribute to a healthier environment, and aid in the fight against climate change. They can also serve as a haven for wildlife, reduce grocery bills, and attract pollinators like bees, butterflies, and hummingbirds.

But fruit trees have their challenges. Different fruit trees have different needs for sunlight, chill hours (winter temperatures), and soil types. They also need plenty of sunlight, good air circulation, and well-drained soil. Plus, they are susceptible to insects, diseases, and hungry animals, and take years to mature and produce a good harvest. So, caring for fruit trees is imperative. Patience is also crucial.

Below are seven tips on planting fruit trees to help you beat fruit tree challenges. You can also consult the experts at RI Tree or take its fruit tree course.

·         Location, location, location

Planting the right fruit tree in the right spot is critical. Take advantage of the USDA’s Hardiness Zone Map to select trees that will flourish in your climate. You can find your hardiness zone by entering your zip code at the USDA website

·        Test your soil. 

Your soil’s pH is critical. Knowing your soil pH can tell you if you need to enrich the soil before planting. Fruit trees prefer slightly acidic soil with a pH between 6.0 and 7.0. Test your soil well before planting in the late summer or fall. That gives you time to amend the soil based on the test results.

·         Pick the right spot

Fruit trees need plenty of sunlight, good air circulation, and well-drained soil. So, pick a spot in your yard to plant a tree or trees that provide these conditions. Consider the mature size of the tree you’re planting and give it ample room to grow without crowding structures, power lines, or other plantings. 

  • Protect trees from pests and diseases 

You may need to protect your tree or trees throughout the year from insects, diseases, and hungry animals. See our blog post and information on our website on this subject. Research fruit tree varieties known for disease resistance in your region, use organic pest control methods and encourage beneficial insects.

  • Plant at the right time of year 

The best time to plant fruit trees is late winter or early spring. Also, dig a proper hole when you plant a tree. It should be 2-3 times wider than the tree root ball and just as deep. And plant at the correct depth. Locate the root flare (where the trunk widens at the base) and plant the tree so the flare is slightly above the soil line. Avoid burying the trunk.

  • Water correctly

Fruit trees prefer deep soakings that encourage roots to grow deep down, searching for moisture. Water your newly planted tree deeply and regularly, especially during the first year. Aim to deliver 2 inches of water at a time, allowing the top few inches of soil to dry out slightly between watering. Water at the tree’s base and use mulch to retain moisture.

  • Prune for growth 

Pruning young fruit trees will help them develop a strong structure and produce more fruit. Prune during dormancy, remove unwanted branches, open up the center, shorten vigorous branches, and cut branches just above a bud that faces outward in the direction you want new growth to develop. Angled cuts heal better.

One last tip: Different fruit trees have different pruning requirements, so you need to prune for your specific tree or trees. Research your tree’s needs to ensure proper pruning techniques for optimal fruit production. Proper pruning will boost your fruit harvest and contribute to the tree’s overall health and lifespan.

RI Tree’s Fruit Tree Course

Fruit trees can transform an outdoor space and deliver numerous benefits. RI Tree’s course on growing fruit trees in your backyard is safe, reliable, and fun. The course is for busy people who want to grow apples, peaches, and pears but have never had the time to learn how. Our novel approach is light on bookwork and heavy on skill-building and personal instruction.

For more information on RITree’s Growing Fruit tree course, see the RITree website. All classes will be held at RITree’s orchard training facility at 2953 Hartford Ave in Johnston, RI. Each session will be 2 hours long starting at 10:30 am. Class size will be limited to 15 persons.

Using Natural Methods to Prevent Tree Diseases Protects  People, Pets, and the Environment

Trees are susceptible to diseases that can stunt their growth, ruin their appearance, and even lead to their demise. But using pesticides and fungicides on plants creates risks that can impact people’s health, their pets, the environment, and even the plants themselves. Water contamination, soil damage, and phytotoxicity are three examples of risks that pesticides and fungicides pose.

Fortunately, numerous natural methods exist that you can use to bolster your tree’s defenses and create a thriving, disease-resistant plant or tree. Natural methods can prevent and control plant diseases without chemicals. These methods include promoting good tree health, using natural sprays and treatments, selecting and planting trees, and monitoring and early detection.

Below, we discuss the benefits of using natural methods for plant disease prevention, provide ideas for preventing plant diseases, and review several natural methods for keeping plants healthy and vibrant

Benefits of Natural Methods

There are numerous benefits to using natural methods to prevent plant diseases compared to conventional pesticides and fungicides. These include:

  • Safer for the environment: Natural methods typically rely on organic materials and avoid harsh chemicals. They can protect beneficial insects, pollinators, and wildlife in your garden.
  •  Better for people and pets: Many conventional pesticides can harm you and your pets if not handled properly. Natural methods generally pose less of a health risk.
  • Reduced risk of resistance: Over time, overuse of conventional pesticides can lead to pests and diseases developing resistance. Natural methods help avoid this problem.
  • Promotes a healthy ecosystem: By encouraging beneficial insects and microbes in your garden, natural methods create a more balanced ecosystem that can help regulate pest populations naturally.
  • Cost-Effective: Many natural methods utilize readily available materials or require minimal investment, making them a budget-friendly option for treating plants.

If you’re a gardener, natural disease prevention methods can help you maintain a healthy, certified organic garden.

Natural methods, however, come with drawbacks. For example, they can take time to implement. The long-term benefits of using natural methods, however, far outweigh their drawbacks.

Examples of Natural Methods

Using natural methods to prevent tree diseases is as effective as using them in gardens. Let’s take a look at some of these methods:

  • Make sure you have the right tree in the right place. Choose trees suited to your climate and soil conditions. Stressed trees are more vulnerable to disease.
  • Water your trees deeply and infrequently. Allow the soil to dry slightly between watering. But be careful when watering plants and trees. Overwatering can encourage root rot.
  • Prune regularly to help trees grow. Remove diseased branches, improve air circulation, and encourage healthy growth. Spreading organic mulch around a tree’s base retains moisture, suppresses weeds, and regulates soil temperature.
  • Natural spray treatments are just as effective as conventional methods. Neem oil, for example, works well against various fungal diseases and insect pests that can harm trees. Introducing natural predators, like ladybugs, lacewings, and predatory mites, in your yard is also effective.  
  • Tree selection and planting are also critical. When planting new trees, opt for varieties known for their resistance to common diseases in your area. Local nurseries can advise you. Planting various tree species helps create a more balanced ecosystem less susceptible to widespread disease outbreaks.
  • You should also regularly inspect your trees for signs of disease. Early detection is critical to successful disease treatment. Typical signs of disease include discolored leaves, tree wilting, or unusual growths. Amending the soil around your tree with compost or other organic matter can improve tree health and disease resistance.

Trees themselves have built-in defense mechanisms against diseases. They can produce chemical compounds that deter insects and fungi or compartmentalize infected areas to prevent the spread of disease.


Prevention is Critical to Tree Health

Preventing diseases in trees is critical to having robust, healthy trees. But your plants may contract diseases despite your best efforts. Natural methods of treating diseases protect people, pets, and the environment. The methods include promoting good tree health, using natural sprays and treatments, selecting and planting suitable trees, and monitoring and early detection. Natural methods can help you keep trees healthy and resistant.

Treating plant diseases, however, can be challenging. Some diseases can resist your best efforts despite much work and cost, no matter how you treat them, which can frustrate you. If you’re getting nowhere treating a diseased plant, contact RI Tree.   Our experts can help you diagnose plant diseases and recommend the best way to treat them effectively. They’ll also help you create a plan to care for your plants or trees.

DEM Warns of Invasive Insects Set to Appear This Spring

The Rhode Island Department of Environmental Management is warning RI residents to remain vigilant for two invasive species as their lifecycles progress and they emerge this spring. The spotted lanternfly (SLF) and the winter moth are two plant pests threatening Rhode Island’s agriculture and forest. These threats remain the focus of DEM’s Division of Agriculture and Forest Environment‘s Cooperative Agricultural Pest Survey (CAPS) and Forest Health Program.

One pest is the spotted lanternfly, which can cause significant damage to crops and native trees. The SLF threatens many fruit crops, such as apples, apricots, cherries, grapes, hops, nectarines, peaches, and plums, as well as native maple, oak, pine, poplar, sycamore, walnut, and willow trees. DEM officials note the lanternfly is an “excellent hitchhiker” spread through human movement.”

Lanternfly adults lay masses of 30 or more eggs on surfaces ranging from tree trunks to patio furniture. These egg masses are typically 1.5 inches long, grayish-brown, and resemble clay. DEM started spraying for SLFs in Rhode Island in 2022. DEM and its partners will continue targeted treatments of trees and bushes infested with SLF as they try to limit the spread of this invasive pest.

Winter moths are an invasive defoliator from Europe. First detected in New England in the early 2000s, the caterpillars of winter moths feed on the leaves of deciduous trees in early spring after larval hatch. Winter moth caterpillars are lime green with creamy-yellow stripes running lengthwise along each side of the body. Preferred hosts include maple, oak, birch, apple, and blueberry. Young larvae feed within their hosts’ leaf and flower buds and are often difficult to spot at this stage. Caterpillar frass (insect droppings) are often easier to observe than the actual caterpillars.

While the increased winter moth activity during the past autumn has generated increased public interest, the winter moth’s defoliation effort isn’t nearly as damaging or widespread as spongy moths, formerly known as gypsy moths. That’s because winter moths do not completely strip leaves. They only cause tree mortality if defoliation is repeated year after year. DEM initiated a successful biological program in 2005 to control winter moths with the specialist parasitic fly Cyzenis albicans.

For more information on the spotted lanternfly and the winter moth, see RI Tree’s Pest to Watch page on its website.