
Discover Proven Techniques for Bigger, Healthier Tree Growth!

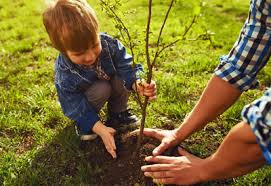
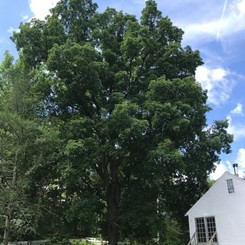
Large, mature trees, such as those listed on the RI Tree’s Champion Tree webpage, offer significantly greater benefits than smaller trees. Planting them, however, can be a challenge. Doing so in the fall reduces “transplant shock” and gives trees the best chance to establish roots before the stress of a full growing season.

Here arHere are seven tips for big tree care in the fall:

Clean up fallen debris
Heavy piles of leaves or debris. Piles of branches can trap pests, fungal spores, and excess moisture, which may damage the tree’s base. Remove them.
To ensure safety, have an ISA Certified Arborist perform a professional safety inspection, especially if the tree is near a residence, driveway, or utility line, or if you notice any sudden, large, exposed roots, or cracks in the trunk. They can recommend corrective measures like cabling or bracing to support weak limbs against winter weathere seven tips for big tree care in the fall:

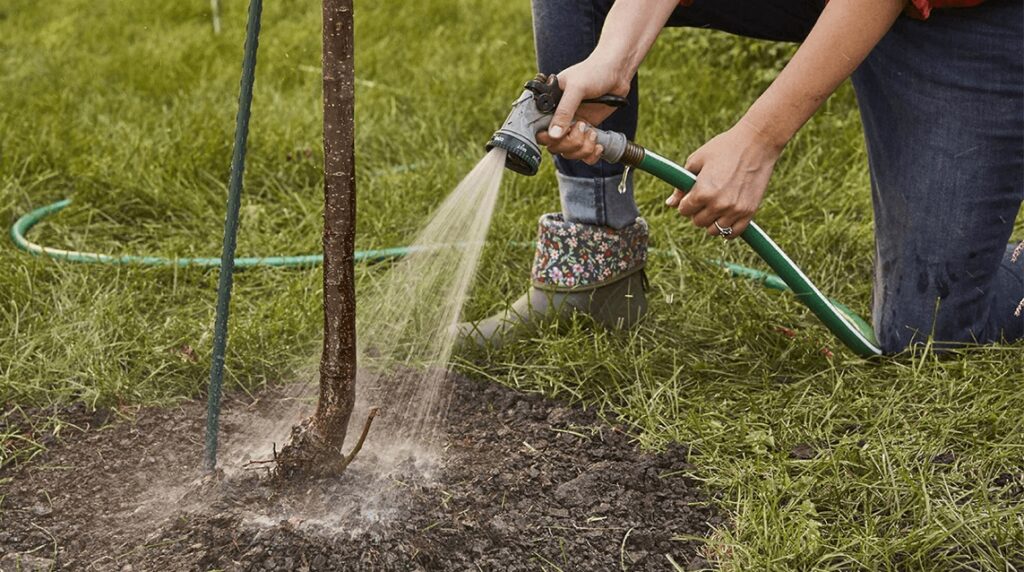
1. Water trees deeply
Water your trees thoroughly until the ground freezes. Even as temperatures decrease and leaves fall, trees still need sufficient moisture to prevent drying out. Focus on the root zone, which extends to the tree’s drip line (the edge of the canopy).

2. Apply a layer of mulch
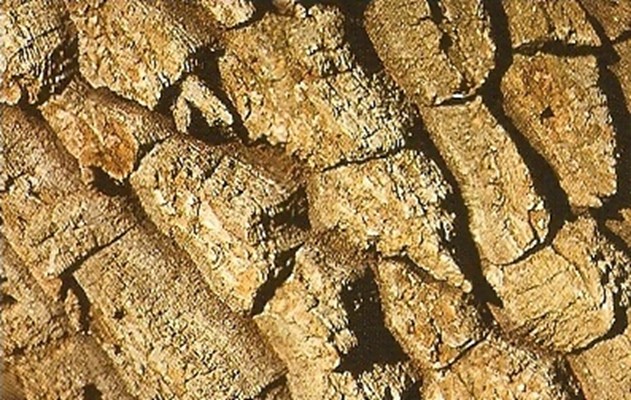
Apply a 2- to 4-inch layer of organic mulch, like wood chips or shredded bark, around the tree’s base. Keep the mulch several inches from the trunk to avoid moisture buildup, which can cause bark rot and disease.

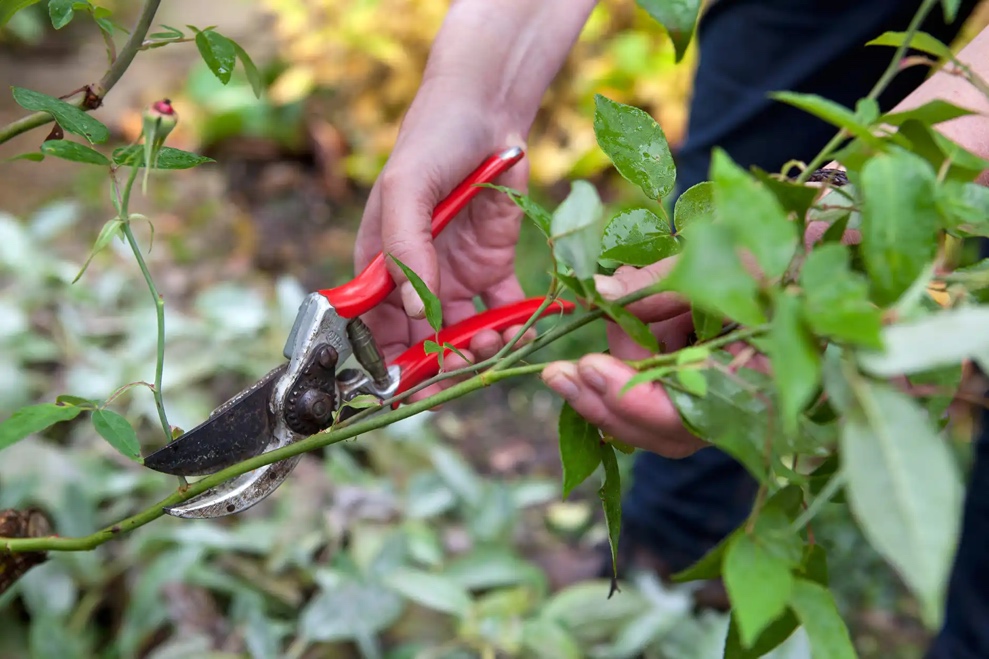
3. Prune dead or damaged Branches
Fall is ideal for pruning dead, diseased, or broken branches. Remove these hazards before winter storms and heavy snow to prevent them from falling and causing damage to people or property.

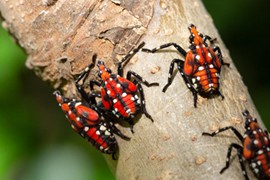
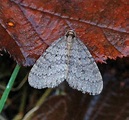
4. Inspect for pests and diseases
Inspect the trunk and branches for signs of insect damage, fungal growth, or abnormal discoloration. Detecting problems early lets you plan necessary treatments before the spring growing season.

5. Fertilize if necessary
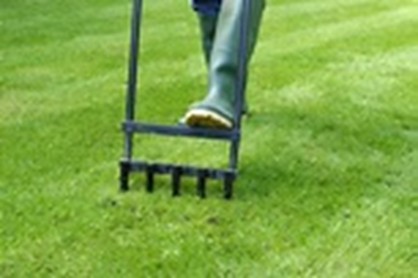
Late fall is ideal for applying a slow-release, deep-root fertilizer, which helps feed the root system. Professional deep-root fertilization is often the most effective approach for large, mature trees.

6. Protect against trunk damage
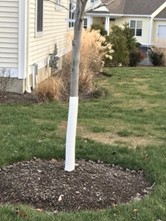
Protect the trunk from sunscald. Use a commercial tree wrap on the lower trunk or consider installing tree guards to prevent damage from rodents and deer rubbing their antlers. Remove the wrap in the spring.

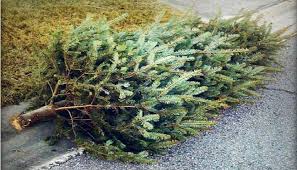
7. Clean up fallen debris
Heavy piles of leaves or debris. Piles of branches can trap pests, fungal spores, and excess moisture, which may damage the tree’s base. Remove them.

To ensure safety, have an ISA Certified Arborist perform a professional safety inspection, especially if the tree is near a residence, driveway, or utility line, or if you notice any sudden, large, exposed roots, or cracks in the trunk. They can recommend corrective measures like cabling or bracing to support weak limbs against winter weather.

Revitalize Your Trees: Discover the Power of Root Deep Care Today!”

Urban trees often require fertilization. That’s mainly due to the unique characteristics of city soils. Signs urban trees need fertilization include yellowing leaves (chlorosis), thinning canopies, short twigs, stunted growth, branch dieback, a weak response to mild drought, and early leaf drop. If you see these signs, your tree or trees need fertilization.

Here are seven tips for fertilizing trees correctly:

1. Get a soil test first

Get a soil test using a local agricultural extension office or lab. The test can determine the soil pH, which determines how well a tree or plant absorbs available nutrients. (The University of Rhode Island will test soil for free.)

2. Choose the right fertilizer type

Prioritize slow-release nitrogen (N) fertilizers. Since nitrogen is often deficient in the soil and critical for foliage growth, consider a fertilizer with a high nitrogen ratio (like a 3-1-2 or 4-1-1 N-P-K ratio)

3. Fertilize the correct root zone

Spread fertilizer across the entire area under the tree’s canopy, extending at least to the dripline. Keep fertilizer a few inches away from the base of the trunk.

4. Apply at the optimal time

Fertilize in mid-spring after the leaves have emerged and grown to full size. That’s when a plant will benefit the most from fertilizer laden with nutrients to help create more energy.

5. Use the correct application method

Spread granular fertilizer evenly over the mulched area and water it thoroughly. Use an auger or punch bar to create 8–12-inch-deep holes, spaced 2–3 feet apart. Then, spread fertilizer evenly among these holes to get the nutrients below the grass roots.

6. Apply the correct rate

Always follow the rates specified in your soil test report. And use the correct type of fertilizer, at the proper rate, at the right time, and in the correct location.

7. Ensure adequate water and mulch

Water the tree or plant immediately after applying fertilizer to help move the nutrients into the root zone. Maintain a 2–4-inch layer of organic mulch (like wood chips) over the root zone.

Fertilizing trees in urban areas is often a must. So, watch for the signs, like yellowing leaves or premature leaf drop, that tell you your trees may need fertilizing. Then do a soil test and follow the test’s instructions for fertilization.

Do you have fertilization questions? Contact the experts at RI Tree. They’ll guide you through fertilization, saving you time and money.

Protect Your Plants and Trees Today: Six Top Tips Against Sudden Frosts

Cellular destruction is the primary danger for plants and trees from a sudden frost. When temperatures drop rapidly below freezing (32°F or 0∘°C), the water inside and surrounding plant cells freezes, causing them to expand and rupture cell membranes.

Trees, on the other hand, experience structural and systemic damage from sudden frosts, which can cause frost cracking, bark splitting, root damage, and sap flow disruption. These create openings for pests and diseases.

Tips on Protecting Plants and Trees

The main goals here are to conserve energy and prevent lethal ice formation inside the plant’s cells. Here are seven tips on how to protect plants and trees:

  1. Cover plants with fabric: Drape old bed sheets, blankets, burlap, or commercial frost cloth loosely over plants and small trees. Use stakes or a frame to prevent the cover from crushing the foliage. Ensure the cover extends to the ground to trap the earth’s stored heat.
  2. Bring potted plants indoors: Move all container plants, especially tender annuals and tropicals, into a sheltered location like a garage, shed, covered porch, or indoors.
  1. Wrap young tree trunks: Young, thin-barked trees can be susceptible to frost damage. Wrap the trunks with a commercial tree wrap, burlap, or even cardboard to provide insulation.
  2. Water deeply before the freeze: Moist soil holds and re-radiates heat better than dry soil. Watering your plants thoroughly during the day before a frost is expected will help keep the root zone warmer overnight.
  3. Apply a thick layer of mulch: For in-ground plants and trees, apply a thick layer (about 3-6 inches) of straw, shredded leaves, or wood chips around the base. The mulch acts as an insulating blanket, helping to keep the soil and roots warm.
  4. Add a heat source (carefully): For very valuable or vulnerable plants, you can place a low-wattage heat source, like a strand of non-LED incandescent Christmas lights, under the cover to generate extra warmth. Always ensure the heat source is not touching the cover or foliage and does not pose a fire hazard.
    A sudden, unseasonal frost endangers plants and trees because it hits before they have had time to “harden off” for cold weather. The primary danger to plants and trees when this happens is cellular destruction due to the freezing and expansion of water. Implementing some or all of the six tips above boosts your plants and trees’ chances of surviving a sudden frost.
    For more information on protecting your plants and trees from sudden frosts, contact the experts at RI Tree.

Revitalize Your Landscape: Discover the Hidden Benefits of Soil Aeration

Compacted soil can kill healthy trees. That’s right. Compacted soil can kill trees. It’s a silent killer. It might seem harmless if you see it, but this dense, suffocating environment deprives roots of three vital resources they need to thrive—oxygen, water, and nutrients. So, you need to address this problem as soon as you see it.

Compact soil is a common issue in urban and suburban landscapes. When soil becomes compacted, it harms the very foundation of a tree’s health. Soil aeration, a crucial practice for enhancing root health and boosting a tree’s longevity and vitality, can address this widespread problem.

Healthy soil features a balance of minerals, organic matter, water, and air. This porous structure allows for proper gas exchange, letting oxygen reach the roots and carbon dioxide escape. It also ensures that water can infiltrate the soil and be absorbed by tree roots instead of running off the surface.

Compaction transforms this process. It squeezes the air pockets and pore spaces needed for root function, leading to several harmful effects, including oxygen deprivation, nutrient and water shortages, and limited root growth. The Fall is a good time to aerate your soil. It promotes root growth and prepares a tree better for winter.

Aerating in the Fall is Optimal

Fall aeration coincides with the tree’s natural growth cycles, allowing it to recover and benefit most from the process. Like those found in Rhode Island, Fall is often considered the optimal time for cool-season grasses.

Here’s a more detailed breakdown of why Fall is ideal for aerating:

  • Promotes Root Growth: In the Fall, a tree’s energy shifts from producing leaves to developing its root system in preparation for winter. Aerating the soil like this lets roots grow into the newly created channels, creating a strong, resilient foundation.
  • Ideal Conditions: The cooler air temperatures and increased rainfall in the Fall reduce a tree’s stress and help the soil remain moist, essential for effective aeration. It’s much easier to work with moist but not waterlogged soil.
  • Winter Preparation: Fall aerating helps trees withstand winter’s freeze-thaw cycles by improving drainage and preventing water from pooling and freezing around the roots.

If you have heavy clay soil that tends to compact, you might need to aerate more often, perhaps once a year. For significant compaction or large, mature trees, consult a certified arborist or the experts at RI Tree.

Three Effective Methods for Aerating Soil

Aeration creates small holes or channels in the soil to mitigate compaction, restore the proper balance of air and water, and deliver nutrients. Several ways exist to achieve this aeration. They each have their own benefits.

1. Core Aeration

This method is a highly effective and widely used. A specialized machine or tool removes small plugs or “cores” of soil from the ground. The benefits of core aeration are profound:

  • Breaks up compaction: By removing soil, core aeration immediately creates channels that allow oxygen, water, and nutrients to penetrate deep into the root zone.
  • Improves gas exchange: The newly created air pockets facilitate the movement of gases, allowing roots to breathe and for harmful gases like carbon dioxide to escape.
  • Enhances water infiltration: Rain and irrigation water can move through the soil profile instead of just running off, ensuring that water reaches the roots where it is needed most.
  • Encourages deeper root growth: With the physical barrier removed, roots can extend further down into the soil, creating a stronger, more resilient root system that is less susceptible to drought.

Soil plugs left on the surface can decompose, returning valuable organic matter and nutrients to the soil.

2. Radial Trenching

Arborists use radial trenching for more severe cases of compaction or larger trees. First, you dig narrow trenches outward from the tree trunk, like spokes on a wheel. You then fill the trenches with a mixture of compost and loamy soil.

  • Direct access: Trenching provides a direct conduit for air and water to reach the roots, and the organic-rich soil mixture encourages new root growth within the trenches.
  • Addresses deeper compaction: Radial trenching can address compaction at greater depths than core aeration, making it ideal for severely distressed trees.

3. Vertical Mulching (VM)

Like radial trenching, VM involves drilling holes around the tree’s compacted soil in a grid pattern. The holes are then filled with compost, sand, and other organic matter. This method

  •  combines aeration and fertilization: It aerates the soil and directly delivers essential nutrients and organic matter to the root zone, improving soil structure.
  • Less intrusive: Vertical mulching can be less disruptive than radial trenching, making it suitable for areas where root damage needs to be minimized.

Apply a layer of organic mulch over the treated area after aeration. This method helps retain moisture, regulate soil temperature, and slowly add organic matter to the soil, supporting long-term health.

For a more comprehensive approach, contact a certified arborist or one of our experts at RI Tree. They can assess the tree’s needs and recommend a combination of aeration, fertilization, and other treatments needed in your situation.

Unleash Your Property’s Potential: Top 7 Secrets For Planting Saplings Successfully

Planting saplings can be challenging. Balled and burlapped (B&B) saplings differ from planting bare-root saplings. B&B saplings are dug up with a soil ball around their roots, which helps reduce transplant shock. Bare-root saplings have no soil around their roots, exposing them, but they are lighter and usually less expensive.
These planting secrets can significantly improve their survival rate and long-term growth of saplings:

  1. Soak or dip bare roots: Don’t just briefly dunk bare roots. After soaking them for a few hours (no more than 24), dip them in a “root dip” product or a slurry of native soil and water before planting.
  1. Create a “watering donut” or berm: Instead of just leveling the soil around the sapling, build a small circular berm (like a donut) of soil about 1-2 feet in diameter around the tree. This technique funnels water straight to the root zone and prevents runoff.
  2. Perform a “scratch test” on the root ball: Gently scratch the outer edge of the root ball. If you notice roots circling tightly around the perimeter, they are “girdling” and will eventually suffocate the tree. Untangling or pruning these roots promotes outward growth.
  3. Think about mycorrhizal fungi inoculation: Inoculating the planting hole with mycorrhizal fungi can greatly benefit saplings. These fungi create a symbiotic relationship with tree roots, significantly enhancing the tree’s ability to absorb water and nutrients from the soil.
  4. “Air pruning” for pot-bound roots (if applicable): If transplanting from a traditional plastic pot, gently rough up the outer roots or make a few vertical cuts with a clean blade to encourage outward growth and prevent the roots from circling in the ground.
  5. Conduct a “tilt test” to check planting depth: When placing the sapling in the hole, hold it upright and gently try to tilt it. If it feels stable and doesn’t easily fall over, the planting depth is correct. Make sure the root collar (where the roots meet the trunk) is at or slightly above ground level.
  6. Prioritize “structural pruning” early on (if needed): Strategic structural pruning can direct the sapling’s growth during the first year or two. Also, focus on removing competing leaders, crossing branches, or weak angles to promote a dominant central leader and a strong scaffold.
    For more on planting saplings, see our blog post here.

Defend Your Trees: Master this Seven-Step Guide to Spotted Lanternfly Removal

The spotted lanternfly (Lycorma delicatula) is highly invasive. It feeds on plant sap and excretes a sugary substance called “honeydew,” which promotes sooty mold growth on plants, reduces photosynthesis, and weakens the plants. Spotted lanternflies don’t fly; they hitch rides on buses, cars, and other objects, which helps their spread. While they don’t hurt humans, they seriously threaten agriculture, including crops, trees, orchards, and vineyards. A recent study in Pennsylvania estimates that crop losses from this pest amount to about $50 million yearly.  

Spotted lanternflies are mainly found in the north-central part of Rhode Island, but that’s changing. Evidence shows these pests are spreading throughout the entire state. Currently, RI DEM is focused on new infestations in the state, such as the recent discovery in Barrington. RI DEM is also working to limit the spread of lanternflies in the state’s agricultural areas, where these sap-sucking pests can damage crops. While RI DEM works hard to control this pest, homeowners can play a crucial role in slowing their spread.

Here are seven steps you can take to help:

1. Destroy egg masses

Destroying the spotted lanternfly’s eggs is among the most effective ways to stop its spread. The females lay their eggs in clusters that look like light gray or brownish mud patches on nearly any hard surface, including trees, rocks, outdoor furniture, vehicles, and fences. The egg-laying season runs from September to December, with eggs hatching in late spring. So, inspect your trees regularly to look for these masses. Then scrape them into a container filled with rubbing alcohol or hand sanitizer to ensure the eggs are killed. 

2. Use sticky bands on trees (with caution)

Another effective way to stop these pests from spreading is to put sticky bands around tree trunks. The sticky surface traps newborns from climbing the tree and reaching the upper canopy. However, use sticky bands carefully. They can also trap and harm other beneficial insects, birds, and small animals. So, use a narrower band, or more importantly, create a guard around the sticky surface using something like chicken wire or window screening to trap the lanternfly newborns. Check the bands regularly for bycatch and replace them as they become full.

3. Remove “Tree-of-Heaven”

The “tree-of-heaven” (Ailanthus altissima) is the primary host of the Spotted Lanternfly. While the lanternfly feeds on over 100 plant species, it thrives when this tree is present. Removing it from your property is an effective long-term management strategy. But simply cutting the tree down isn’t enough. The stump can re-sprout and grow stronger. Instead, use the “hack-and-squirt” technique to kill the tree. It applies a targeted herbicide directly to the tree’s vascular system. When done right, this technique kills the tree completely.

The important life stages of the Spotted Lanternfly: eggs, wingless nymphs and the adult with wings for flight.

5. Check vehicles and outdoor equipment

Spotted lanternflies are excellent “hitchhikers.” They do not travel great distances on their own, but they are very adept at latching onto vehicles and other objects. Inspect your vehicle or any outdoor things you take before traveling, especially if you live in or are leaving a known infested area. If you are moving firewood, outdoor furniture, grills, or any other equipment, thoroughly inspect both adult lanternflies and their egg masses. By taking a few moments to check for hitchhikers, you can prevent the unintentional spread of this invasive pest to new areas.

6. Use insecticides responsibly

Insecticides may be necessary if there’s a sudden infestation. You have several options for insecticides, including contact sprays and systemic treatments. Sprays kill insects on contact and can help effectively manage visible populations. Use insecticides responsibly and follow all label instructions. Systematic treatments to a specific tree or area are best applied by a professional. Consider the environmental impact and potential harm to non-target species before applying any chemical treatment. 

7. Stay informed and report sightings

The fight against the spotted lanternfly is ongoing, and the best practices for management are constantly being refined. It’s critical to stay informed about the latest recommendations from your state’s agricultural extension office or department of agriculture. These resources provide up-to-date information on identification, management, and the current boundaries of the quarantine zones. You can always check the RI Tree for the latest news on the lanternflies or this RI DEM  website.

Boost Tree Health Now: Six Proven Strategies to Beat Drought Stress

July was hot, with the average daily high around 84°F (29°C). Several days in July reached the 90s or higher, with some even hitting 100. Rainfall averaged 5 inches, which can keep most soil moist, but still not enough for plants to survive and thrive. If this month is anything like August in other years, it could be just as hot as July, if not hotter.

History indicates that August tends to be at least several degrees hotter in Rhode Island than July. This month often records the highest summer temperatures of the year. By mid-month, plants could begin to show early signs of drought stress, which can negatively impact their growth and development. Combating drought stress can be a challenge.
Drought Stress Symptoms

Drought stress symptoms in plants include cupped and curled leaf edges, wilting of foliage, and new shoots less than a year old. Other signs are yellowing or browning leaves and early dropping of leaves or fruit. Drought-stressed plants may also show stunted growth and overall lack of vigor.

Drought stress also weakens a plant’s defense systems, making it vulnerable to secondary problems like Gypsy moths, root rot, and canker fungi. These “secondary invaders” are often the final cause of death for a distressed tree or plant. As a result, trees and shrubs may need extra watering to protect them from damage.

Challenges to Plants from Drought Stress

Drought stress poses significant challenges for tree care, impacting tree health and increasing susceptibility to other issues:

• Pests during this time include Bark Beetles, which are one of the most well-known groups of pests that capitalize on drought-stressed trees, especially conifers like pine, spruce, and fir. Weakened trees can’t produce enough resin to “pitch out” the beetles, allowing them to tunnel under the bark. Other pests to watch out for include Ambrosia beetles, scale insects and mites, and gypsy moth. (Spongy moth).

• Diseases to watch for include canker fungi, which appear sunken and dead areas on tree bark. Many fungi that cause cankers, such as Cytospora and Nectria, need a stressed host to infect successfully. Drought-induced bark cracking can also let these fungi enter. Also, watch for root rot, which can damage a tree’s root system and make it more vulnerable to various pathogens and vascular wilts, which can block a tree’s water transport system.

Six Steps to Battling Drought Stress
As a caretaker of trees, your role in combating drought stress is crucial for their long-term health and survival. Here are six critical steps you can take to make a significant difference:

  1. Water deeply and infrequently: Trees are remarkably resilient. By providing a slow, thorough soak of the entire root zone, you encourage this resilience and enhance their long-term survival. Aim for about one inch of water per week from rain or irrigation. Remember, watering deeply once a week is better than giving shallow, frequent watering.
  2. Mulch for moisture retention: Apply a 2-4 inch layer of organic mulch, such as wood chips or shredded bark, around the tree’s base. Mulching helps the soil retain moisture, reduces evaporation, and suppresses competing weeds and grass. Keep the mulch a few inches from the tree’s trunk to prevent rot and pest issues.
  3. Prioritize trees: Focus on watering your most valuable or vulnerable trees. This step includes newly planted trees (within their first 3-5 years) and mature trees that provide significant shade and are expensive to replace. Brown lawns will recover; dead trees won’t.
  4. Avoid fertilizing: During a drought, a tree’s energy should focus on survival not growth. Applying fertilizer can stimulate new growth, which requires more water and can increase the tree’s stress. Wait to fertilize until the drought ends and the tree has recovered.
  1. Stop pruning (except for deadwood): Avoid unnecessary pruning of live branches, as this creates wounds that require healing energy. This energy should be conserved during a drought to help the tree cope with stress and survive. Only prune to remove dead, damaged, or diseased branches, as they can harbor pests and diseases.
  2. Eliminate competition: Remove turfgrass and weeds from beneath the tree’s canopy. Grass and weeds directly compete with the tree for water and nutrients. Replacing this area with a layer of mulch is an effective way to support the tree.
    Recently Installed Trees

Recently planted plants (up to 3 years after planting) require at least 10 gallons of water per week, which should be doubled for established plants. Additionally, to reduce water evaporation, irrigate either early in the morning or at dusk when the temperature is below the daily high.

Finally, trees and shrubs are nearing the end of their annual growth cycle. The last stage of this cycle involves developing the buds for next year (both vegetative and flowering). By the end of August, these new buds should be visible in the leaf axils, where the leaf attaches to the stem.
Be vigilant and watch for plant drought symptoms that appear when daily temperatures rise above 85°F for 3-4 days in a row or dry conditions persist for more than 10 days.

Need help combating drought stress? Contact RI Tree by phone (401) 764-5885 or email. Our experts can provide proven strategies to help your plants survive and thrive.

Addressing Winter Damage: 7 Ways to Get Your Property in Shape Now

This winter left a lot of damage in its wake. Trees and shrubs bore the brunt of this year’s winter. Spring is the ideal time to clean and prepare your property for the warmer months. The key is to closely review the landscape and assess trees and plants for structural damage. When doing so, inspect the entire tree or shrub for any damage. It will save you time and money.

Here are seven tips to help you get your property in shape:

  1. Clear out winter debris: Start by removing leaves, twigs, fallen branches, and other accumulated debris from your lawn, garden beds, and hardscapes like patios and walkways. This exercise helps prevent diseases and allows air and sunlight to reach your grass and plants.
  2. Prune and trim: Inspect your trees and shrubs for dead, damaged, or overgrown branches from winter. Prune these back to encourage new, healthy growth. For spring-blooming shrubs, wait until after they’ve flowered to avoid removing this year’s blooms. You can also trim back dead perennial foliage and ornamental grasses.
  3. Prepare garden beds: Clear out old annuals and dead plant matter from your garden beds. Amend the soil with compost or other organic materials to replenish nutrients and improve drainage. This step creates a nourishing foundation for new plantings.
  1. Address your lawn: Not everyone has a lawn. If you do, do the following:
    • Rake
    • Aerate
    • Fertilize
    • Control weeds
    • Overseed bare spots
  2. Inspect and clean hardscapes: Power wash your patios, decks, driveways, and walkways to remove dirt, grime, and mildew that may have accumulated over winter. Also, check wooden structures like decks and fences for any rot or damage and make necessary repairs.
  3. Check gutters and drainage: Clean your gutters and downspouts to ensure they are debris-free and can properly direct water away from your home’s foundation. Inspect the grading around your house to confirm it slopes away, preventing water from pooling.
  4. Prepare outdoor equipment: Get your lawnmower and other gardening tools ready. Sharpen blades, check oil levels, and ensure everything is in good working order. This activity will make your spring clean-up tasks much easier and more efficient.

Common Spring Pests and Diseases

Spring in New England brings a flush of new growth and the emergence of various pests and diseases that can impact your plants. Being vigilant and knowing what to look for can help you address issues early. Here are some common pests to watch for in New England during the spring:

Common Pests:

  • Aphids: These small, soft-bodied insects come in various colors and suck sap from new growth, causing leaves to curl, yellow, or distort. Look for them on the undersides of leaves and new shoots.
  • Eastern Tent Caterpillars: You’ll see their distinctive silken “tents” in the crotches of trees like cherry, apple, and crabapple. The caterpillars emerge in early spring and can defoliate branches.
  • Winter Moth Caterpillars: These small, green loopers emerge in early spring and feed on buds and new leaves of a wide range of deciduous trees, including maples, oaks, and fruit trees. They can cause significant defoliation. See photo below


Hemlock Woolly Adelgid: A serious invasive pest of hemlock trees. In spring, you’ll see small, white, cottony masses at the base of hemlock needles on the twigs. These insects suck sap and can severely weaken or kill hemlocks.

Spider Mites: Though tiny, spider mites can cause stippling (tiny yellow or white dots) on leaves, especially on evergreens and stressed plants. In severe cases, you might see fine webbing. They thrive in dry conditions.

Common Diseases:

  • Apple Scab: A prevalent fungal disease of apple and crabapple trees. Look for olive-green to brown spots on leaves and fruit. Infected leaves may turn yellow and drop prematurely.
  • Anthracnose: A group of fungal diseases affecting many deciduous trees. Symptoms include irregular brown spots on leaves, often concentrated along veins, and can lead to twig dieback and defoliation, especially during cool, wet spring weather.
  • Powdery Mildew: Appears as white, powdery patches on leaves, stems, and sometimes flowers. While often more prevalent later in the season, it can emerge in spring on susceptible plants when conditions are humid.
  • Cedars/junipers and apple/crabapple trees: In spring, bright orange, gelatinous galls may appear on cedars, releasing spores that infect apple and crabapple leaves, causing yellow-orange spots.

Also, be careful about ticks and mosquitoes. While not plant pests, spring is when these nuisance insects become active and pose health risks to humans and pets in New England. Take precautions when spending time outdoors.

For more information on pests and diseases in New England, contact our experts at RITree.org.

7 Tips on Winter-proofing Young Trees

Young trees are the key to a healthy, thriving urban landscape. But they face many

 challenges in winter. Extreme cold can cause a tree’s tissue to freeze, split, and die. Newly planted trees are especially susceptible to extreme cold. Other winter challenges are desiccation (drying out), sunburn, rodents, and ice and snow damage.

Young trees are more vulnerable in winter than mature trees because of their thin bark, shallow roots, and lack of developed defenses. Here are some of the more severe winter threats to young trees:

  • Snow and ice damage
  • Freezing temperatures
  • Desiccation (drying out)
  • Sunburn (aka sunscald)
  • Rodent damage

Being proactive is the key to protecting young trees in winter. Use the seven actions below to take control of young trees.

  1. Tree Wraps: Thin bark wrapped around the trunks of young trees protects them from sunscald and frost damage. Wrap your trees in late fall before the first hard frost. 
  2. Mulch—Apply 2-4 inches of mulch around the tree’s base, out to the drip line (the outermost edge of the canopy where water drips off the leaves).
  3. Watering—Water young trees before the ground freezes. Well-watered trees are better equipped for winter. Don’t over water young trees; soggy soil can cause problems.
  4. Pruning—Don’t prune in late fall or early winter. Prune in late winter or early spring when trees are dormant. Remove dead, diseased, or damaged branches and branches crossing or rubbing against each other.
  5. Inspect trees—Look for pests or diseases and act accordingly. Winter is a great time to treat trees for specific pests that overwinter in the soil or on the tree.  
  6. Staking—You may need to stake some young trees. If you stake your trees, make the stakes loose enough to allow trunk movement in the wind. Make sure the stakes are about a foot away.
  7. Snow Removal—Wet, heavy snow is bad for young trees. Gently shake the branches to remove excess snow. Don’t jerk or pull the branches.  

Now that you know how to winterize young trees, be proactive and take steps now to protect them in winter. If you have questions about winterizing young trees, contact a registered arborist or one of our experts at RITree.

Use These Tips to Dispose of Your Christmas Tree Responsibly

Disposing of Christmas trees after the holiday is a challenge. Many pros and cons exist for buying a real tree. Growing Christmas trees, for example, absorbs atmospheric carbon dioxide, which is good for the planet. Real Christmas trees are also renewable when sourced from sustainable tree farms. Plus, real trees are biodegradable.

Real trees also can be composted or chipped for mulch, returning nutrients to the soil. What’s more, buying from local sources supports local businesses. If you have an artificial tree, it can be used for many years, reducing the need for repeated tree purchases. Plus, it avoids the waste associated with single-use trees.

But real Christmas trees have downsides. Transporting them from farms to stores creates a significant carbon footprint. Trucks and other vehicles that burn fossil fuels are required to deliver the trees. Cutting down trees at a tree farm also contributes to deforestation if they are not responsibly sourced.

If improperly disposed of in landfills, real trees can decompose and release methane, a potent greenhouse gas. If you favor artificial trees, disposing of them involves high energy consumption and using harmful chemicals. If made from plastic, they can be challenging to recycle and often end up in landfill.

Disposing of Christmas Trees Responsibly

Which approach is better? It all depends. Ultimately, the most environmentally conscious choice depends on individual circumstances and priorities. Ideally, you want to minimize your environmental impact by buying trees from reputable sources or buying sustainably produced artificial trees. Use your Christmas tree for as long as possible, and then dispose of your tree properly. Below are some tips on doing that.

Here are several options that involve giving your Christmas tree a new role:

• Use it as firewood —You can cut it up and use it as firewood. But the wood may still be wet, so use it only in an outdoor fire pit and only when the wood is dry. Using it indoors otherwise is a fire hazard.

• Recycle it as winter mulch—Leave the tree in your yard for the winter. It can provide much-needed shelter for small animals and birds. In the spring, chop it up and use it for mulch.

• Make it a bird feeder — Place it in its stand outdoors. Then, fill some bird feeders and hang them from the tree’s boughs. You can also drape the tree with a swag of pine cones coated with peanut butter.

• Protect plants with it — The winter is hard on tender plants. Cut a few branches or boughs from the tree and cover your tender plants for the winter. The branches will protect them from the season’s harshness.

• Add Christmas freshness to your home — Strip the tree’s pine needles and make a sachet of them. Then, hide them around the bathroom and kitchen for some cheerful fragrance.

Additional Tree Disposal Options

Many Rhode Island cities and towns offer curbside pickup during designated weeks in January. This option is easy, but check your local municipality’s website or sanitation department for pickup dates and guidelines. Providence, for instance, will collect trees on its regular trash pickup day in January. Check with the Department of Public Works for when the program starts and ends. The pickup period ran from January 3rd to 20th last year.

Remove everything from the tree before putting it out. The Rhode Island Resource Recovery Corporation (RIRRC) has an online guide with detailed information on when cities and towns pick up trees. You can also bring the trees directly to the Johnston facility. RIRRC grinds the trees and adds them to a composting operation that produces 40,000 tons annually.

Trees for Trout Program
Another popular option is to donate the tree to the Rhode Island Department of Environmental Management (DEM) Division of Fish and Wildlife for its Trees for Trout program. RI DEM partners with Trout Unlimited Rhode Island Chapter on this program, which uses donated trees to build fish habitats in rivers and streams. This effort restores the water bodies and gives trout and other aquatic animals a place to hide from predators.
The next collection event for the Trees for Trout program is on Saturday, January 4th, 2025, from 10 am to 2 pm at the Arcadia Check Station in Exeter, RI. You can find more information about the program on the DEM website or the Rhode Island Chapter of Trout Unlimited website.
Christmas is a great time of the year. But once it’s over, you must do something with your tree. If your municipality provides that service, you can always put it on the curb for trash pickup. But if that option doesn’t appeal to you, you can use the tree better by giving it another role. Use the tips above to make that happen.